
How I Doubled My Living Space (Without Building More House!)
- By Captain DIY
- •
- 30 Aug, 2018
- •
No need to build more house if there's space you're not using!

The History of the Headquarters now goes back about three years. In that time, we ripped out and replaced the kitchen, ripped out and replaced the bathroom, installed all new floors throughout, and even put lights in the bedrooms where there had been none before.
All of these projects were in the first six weeks of owning the home; we hadn’t even started living there yet and we knew these projects had to happen. And yes, that was a ridiculously
busy six weeks. Full time job, spouse with part-time job, and two kids under the age of five.
More recently, specifically in the dead of this most recent winter, we realized that we could really utilize the house far more efficiently than we had been.
What a Beautiful…Basement?
One of the selling points of this house for me was the large, spacious basement. I know, that makes me a bit of a wierdo (it’s the only thing
that makes me a wierdo), but I really appreciate having a useable basement.
It’s great for workouts
when the weather is extreme on either side, storage is possible without the subterranean elements swallowing your possessions, and I can also use it as a shop for my side business.
Mrs. DIY and I had been talking for a while about how to “encourage” the kids to move some of the pile of toys threatening to encompass the living room elsewhere, and we realized that we were sitting on a treasure trove of space. Literally, it was right underneath us the whole time.
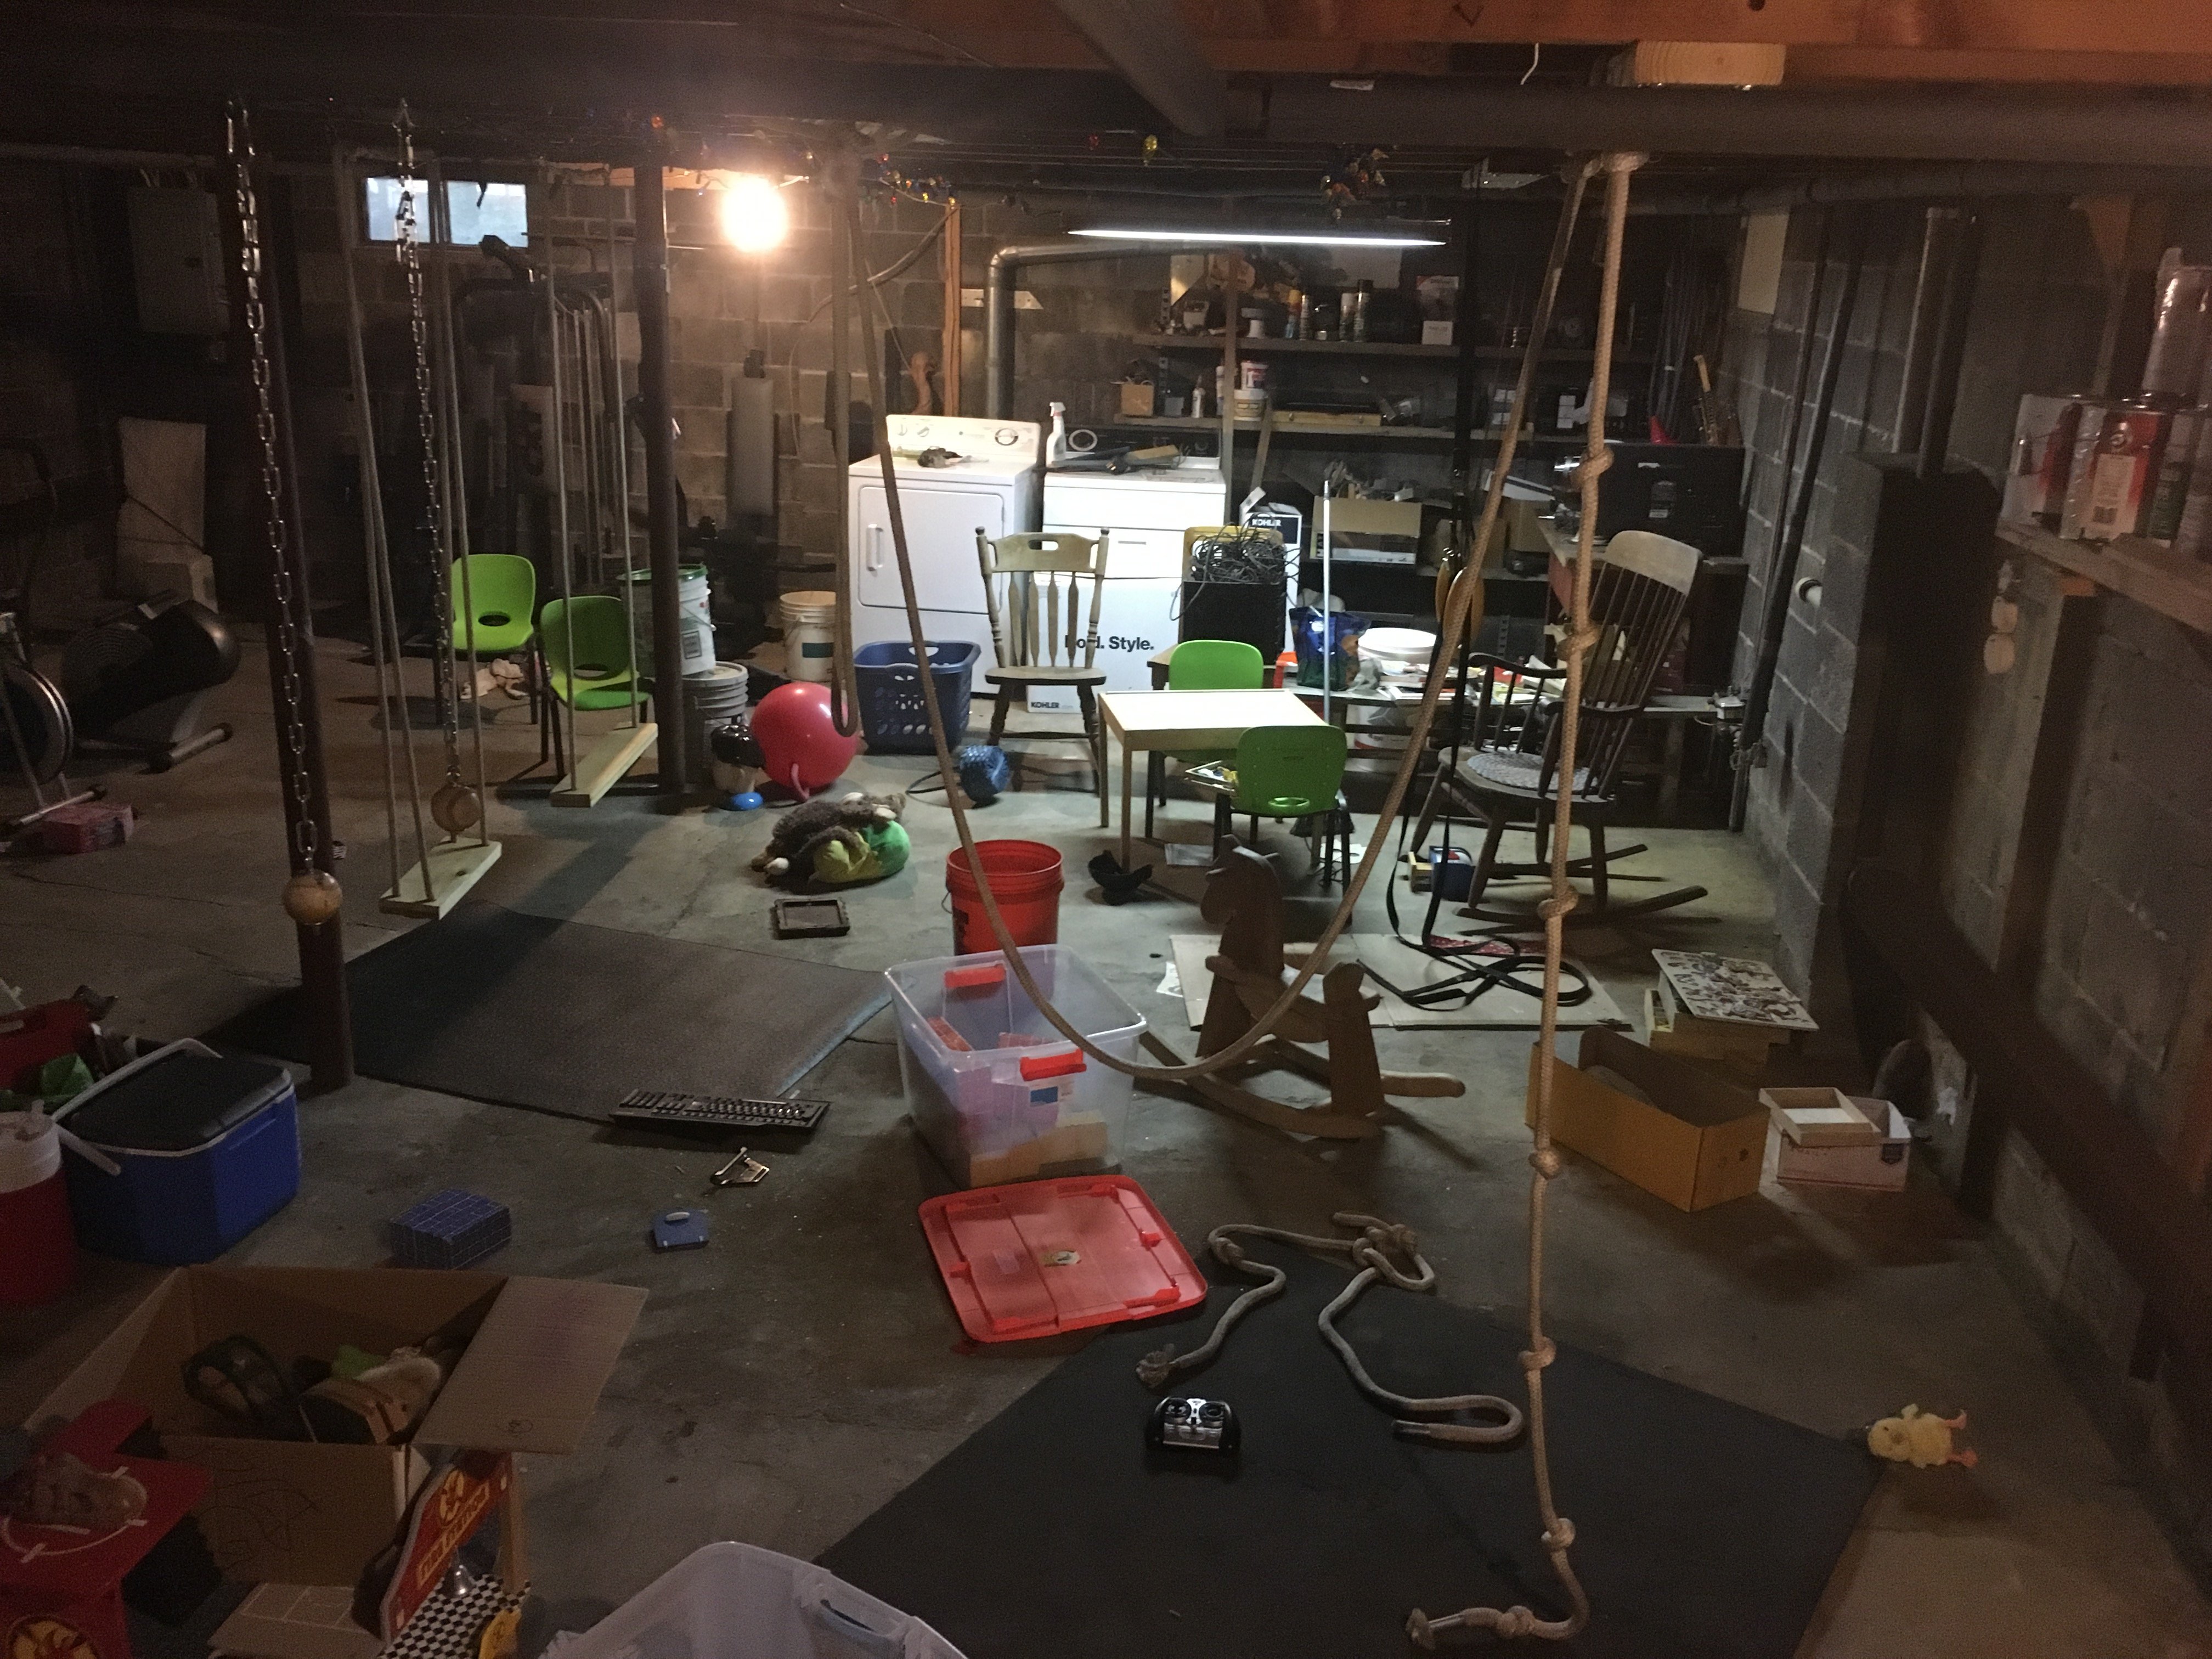
We decided to DIY a play space down there for the little monkeys, and we made it into an indoor jungle gym with just a few pieces of rope and some leftover wood scraps.
The Basement Swing Set
I took some leftover pieces of one-inch-thick boards and screwed them together for strength, then drilled some holes on the ends just big enough for the rope. I happened to have some old climbing rope from my arborist father, which was plenty strong to hold my pompous butt. I figured a couple of sub-60 pound butts would do just fine on there.

I took a couple of eyebolts and bolted them to the main carrying beam of the house, and clipped some carabiners to that, then tied the rope on so the swings were at just the right height.

As you can see, I’m not very good with knots. A little bit of wire makes them completely slip-proof, although I don’t think I could market that technique legally. Maybe, if you’re going to try this, learn how to tie some proper knots.
I also bolted some boards to the floor joists above, so I would have a few places to tie ropes and other danglies. From one of these I hung a piece of rope with a bunch of knots in it, which has proven to be the most popular attraction down there by far.
I also drilled out some baseballs and hung them up with some chain. It’s amazing how strong our hands are when we use them, and my 8-year-old son can actually do multiple pull-ups hanging on these baseballs!

I hung a few more pieces of rope here and there just because I had more left, and the overall effect has been a fun, useful space! Of course, the kids insist we be down there with them, so it’s not without some
downsides.
The Attic
This is a project I was hoping to dedicate a whole article to, but since I can’t seem to get myself disciplined enough to finish up the last few details, I’ll give a teaser of it here.
The house has a walk-up attic, and it has a beautiful oak staircase leading up there. Unfortunately, when we bought the house, the stairs went up to a completely unfinished, dusty, cobweb-filled typical attic. So we threw a few boxes of crap up there and called it a day.
The bedroom my son was using was really small, and we were also thinking it would be nice to size our bedroom up a little bit. We got some quotes from contractors to lift up the roof a little bit, as it was a little low, but they were all crazy expensive. Surprise, surprise.
So it was decided that we would embrace the ethos of Captain DIY and make the room the way we wanted it using the existing framework.

We laid a subfloor, followed by a finished floor, added some window space, insulated and drywalled it, added a knee wall, and installed electrical outlets. We also made provisions for lighting, but we haven’t hashed out the details of that just yet. When we do, you can bet the Captain will be detailing it here!
Red Foot, Blue Foot, Round Foot, Square Foot
When we bought the house, it had right around 1000 square feet of livable space. by adding in the basement features, we essentially doubled that. I can’t count it that way of course, since we still have a sizable portion of the basement being used as storage and utility, but I’d venture to guess we added at least 600 square feet of usable space down there.
The usable space we got out of the attic, although it does have a bit of a low ceiling near the edge, is right around 500 square feet. That also means our house went from a three-bedroom to a four-bedroom.
Now For the Money
As far as the basement project goes, we spent around $30 on various bits of hardware and miscellaneous. A lot of the stuff we had kicking around, but realistically the same project could be done for less than $100 with all new materials.
The attic was certainly more expensive. We hired contractors
to do the insulation and to drywall the ceiling, and the combined costs of those was around $8000. We had to go with closed-cell spray foam insulation to get the proper R-value, and that stuff is super expensive. The week after we got it done was over 90 degrees, however, and the whole house was noticeably cooler thanks to that insulation! By the way, while I ran wires up for electric baseboard heaters, I never installed any. We have made it through one extremely cold New England winter, and the insulation has proved it’s worth.
We also contracted out the drywalling of the ceiling because that is a tough, thankless job, and just hauling those forty-odd sheets of drywall up the stairs earned those guys their pay. Two guys worked hard and long for two days just to hang it. Of course, I had the luxury of recruiting Guest Expert Tom to help me with the drywall finishing.
All told, we ended up shelling out roughly $10k for the upstairs project, which pales in comparison to the $100k+ estimates we were getting.
And In the End
As anyone who has tried to add on to their house knows, these things can get real expensive real fast.
We managed to find some ways to expand the usable footprint of our house without expanding the actual footprint. DIY isn’t just for developing great skills
and building up a sweet set of tools. It’s also about coming up with creative solutions to your problems, and finding practical work-arounds that won’t upset your savings rate too much.