
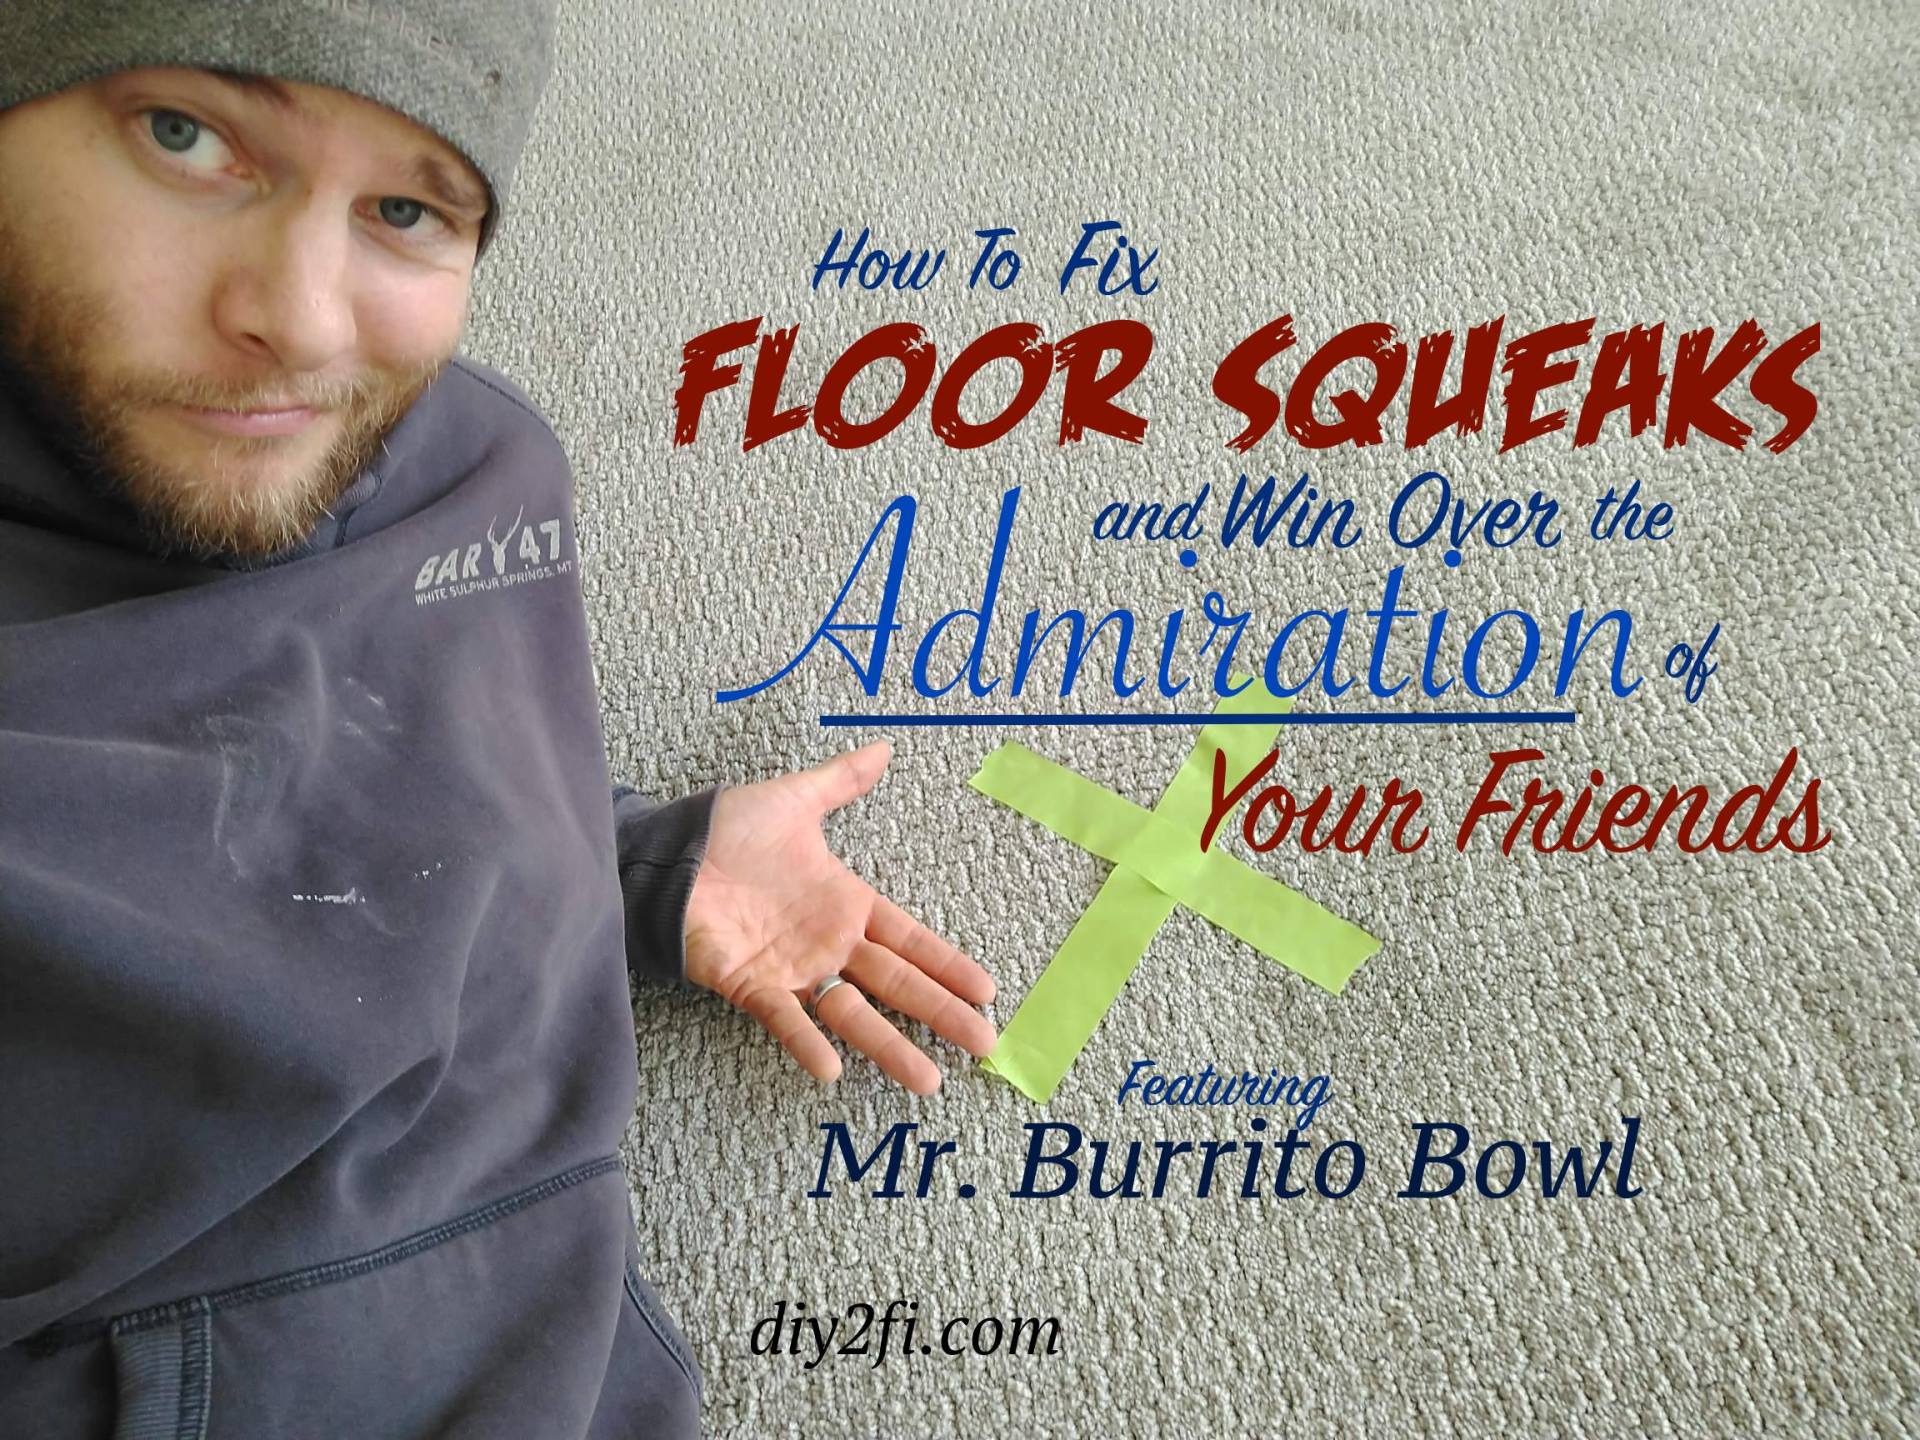
How to Fix Floor Squeaks and Win Over the Admiration of Your Friends
- By Mr. Burrito Bowl
- •
- 26 Nov, 2018
- •
"Ha, Look at that Loser with his Squeaky Floors! Let's Secretly Judge him," - Your So-Called Friends.
Well folks, we have a real treat for you today! My friend and fellow writing savant Mr. Burrito Bowl has graced us with a fantastic guest post that is sure to inform and entertain, possibly more so than any of my posts even though he claims to not be much of a DIYer. Be sure to swing by his site at The Burrito Bowl Diaries
for more of his hilarious insights that have less to do with floors and more to do with life and money. OK, take it away, Mr. BB!
So, you've got a squeaky floor. It happens. It doesn't make you less of a man. Yeah, your buddies tease you a little. The truth is they have no idea how to fix it either. Don't even worry about it. Luckily for you, you read a kick ass financial fix-it blog. Captain DIY and Mr. Burrito Bowl are here to teach you the ways of science and manly do it yourself fixes.
There are several types of floor squeaks. One type is beneath carpet. We can fix that. The second type is beneath hardwood flooring located on the first floor. Generally speaking, we can also fix that, but not always. The third type is beneath tile or hardwood that isn't on the first floor. In that case you're f*cked. Try moving to a new house. We can deal with the first two, though.
There are several types of floor squeaks. One type is beneath carpet. We can fix that. The second type is beneath hardwood flooring located on the first floor. Generally speaking, we can also fix that, but not always. The third type is beneath tile or hardwood that isn't on the first floor. In that case you're f*cked. Try moving to a new house. We can deal with the first two, though.
Why Does A Floor Squeak?
To understand floor squeaks you have to understand how a floor is constructed. First, you have joists. Those are the big pieces of wood that run across your floor and keep your floor from falling down. When I say pieces of wood I mean that in the same way a beam is a piece of wood. Here’s what a joist looks like:
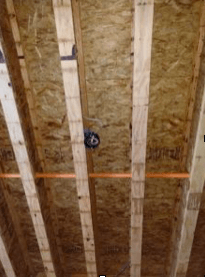
These are joists. Technically, these are I-Joists. They are basically a 2x4 on top and bottom with about 8 inches of plywood sandwiched in the middle.

Joists are placed every 16 inches if your framer owns a tape measure. So, in other words, joists are occasionally placed 16 inches apart. On top of the joists are flat pieces of compressed plywood, also called OSB.
Moderately Fun Fact: OSB stands for Oriented Strand Board.
These pieces of plywood are typically a half inch thick, 4 foot wide, and 8 foot long. After that you have either padding and carpet, hardwood or laminate of some kind, or hardiebacker board and tile.
The plywood is attached to the joists with glue and nails. In a perfect world that bond is never broken. Like the bond between two lovers dying in the hospital having one last kiss. Sorry, my wife is watching Grey's Anatomy. She's crying right now. I don't know what is going on but it's really emotional. In real life that bond is broken quicker than a Vegas marriage on the fourth of July, or any other date for that matter.
Floor squeaks happen because the plywood works it's way loose from the joists below. When it becomes loose it either rubs on another piece of plywood or the nail attached to it. This causes an emasculating squeak.
What You Goin' Do 'Bout It?
What you're going to do is put some screws into those plywood sheets causing them to fasten to the joists below. Screws tend to hold much better than nails and you're going to be the one to screw these loose boards down. Pretty manly of you if I do say so myself.
You might be wondering why they don't fasten the floors together with screws to begin with. Well, we're lucky if the framers make your doors square, we can't hope that they'll use screws instead of nails. The truth is, nails can be put in a nail gun and quickly shot into the wood. Screws have to be, well screwed. This takes time. Houses are generally nailed together. Try not to worry.
You'll need to take a trip to the hardware/liquor store to get this do it yourself project done. Here's the list below:
1. First thing you'll need is a good bourbon. Buy two bottles. Send one to the Burrito Bowl Diaries headquarters in Portland, Oregon.* Keep the other for yourself. Don't questions the process. Believe me, you'll need the bourbon. Either, you'll want to congratulate yourself on a job well done or you'll need one after you've placed approximately 47 screws into your floor while the squeak persists like some sort of unwanted roommate.
2. The rest of your list includes a hammer, some 2 1/2 inch nails, a drill, and a box of 'squeak no more' screws.

These little suckers are awesome. They look like this:

What these magical suckers are is a screw that you can break the top inch off of. This enables you to drill them into the carpet and break the top off below the carpet padding. This allows you to secure the plywood to the joist without having to feel the screw when you walk on the carpet. People aren't as hardy these days and tend to not want to walk on carpet with screw heads sticking through.
So, What Do We Actually Do?
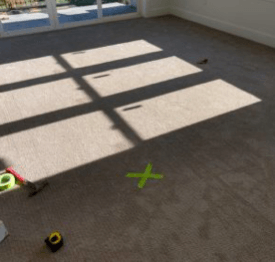
Ok, so let's pretend the floor squeak is on the carpet. Assuming you're not a carpet installer you'll want to leave the carpet where it is. You can pull up the carpet if you want but then you'll need a way to stretch the carpet back out. You don't need to do all that.
First thing you need to do is find the joist beneath the carpet. We know we need to secure the plywood floor to the joist below. Damnit, where is that joist?
Grab your hammer and a nail. Hammer the nail into the floor through the carpet until only half the nail is showing. Either the nail will break through the initial plywood and hit the joist or it will pass straight through into the open air. If you miss the joist, the nail will hammer straight through with relative ease. If you hit the joist it will be harder to hammer the nail in. It's important to not hammer the nail all the way in because we're eventually going to be taking all the nails out.
The goal is to hit the joist.
Assuming you miss the joist with the first nail, you'll place a second nail horizontally two inches away from the first nail and try again. You move two inches because the width of a joist is about two inches. If you move more than two inches there's a chance you could skip right over the joist entirely. Repeat this pattern until you've gone at least sixteen inches because joists are placed sixteen inches apart. I usually try to do ten nails to make sure the length of my trail of nails is longer than sixteen inches.
Assuming you miss the joist with the first nail, you'll place a second nail horizontally two inches away from the first nail and try again. You move two inches because the width of a joist is about two inches. If you move more than two inches there's a chance you could skip right over the joist entirely. Repeat this pattern until you've gone at least sixteen inches because joists are placed sixteen inches apart. I usually try to do ten nails to make sure the length of my trail of nails is longer than sixteen inches.

If you hammer ten nails halfway in and still haven't hit a joist then you want to go to the middle nail and start the process again going perpendicular to your first string of nails. The reason for this whole process is to figure out which direction your joists are running.
Eventually, through dumb luck or sheer willpower you'll hit a joist. Once you've found the joist you want to place a few more nails surrounding that magic joist hitting nail. You want to surround it to figure out which other nails also hit the joist. This will tell you which direction the joist is going.
Eventually, through dumb luck or sheer willpower you'll hit a joist. Once you've found the joist you want to place a few more nails surrounding that magic joist hitting nail. You want to surround it to figure out which other nails also hit the joist. This will tell you which direction the joist is going.

Once you've figured out which direction the joist is going you can get a mental image of where the joists are located under the carpet.
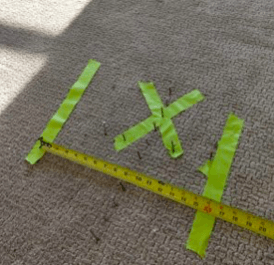
Place some tape along the joists so you remember where they are. Remember, they'll all run the same direction and all be approximately 16 inches apart.
Now to Find the Squeak
Alright, you've found the joist. You can now successfully nail the plywood and joist together. Place nails in your carpet along the joist line until you hit that magic spot where the squeak disappears. This will take some trial and error. Once the squeak disappears you'll take that nail out and replace it with a 'squeak no more' screw. Screw that sucker in 3/4 of the way in and stop. Make sure the squeak is still gone. If the squeak is gone break the top portion of the screw off. If the squeak is still there continue placing a few more screws in line with the joist.


Just like magic you’ve just managed to make a debilitating floor squeak completely disappear. At this point most of your friends wives or girlfriends will be flocking around you feeling your biceps and making weird drill and screw innuendos.
Take a Drink, You've Earned It
Now comes the bourbon. Open that sucker up, take a drink and say something manly like, “Just part of the job. *wink*"
Truth be told it's a bit of a guessing game. Some floor squeaks you’ll get in a minute or two and some will take a substantial amount of screws and/or swear words.
In a later post we’ll detail how to take care of floor squeaks under laminate or hardwood but those require going into a crawl space with spiders so we’ll stick with carpet squeaks for now.
*It's illegal to ship alcohol across state lines so for sure wrap it up really good before you send it. I don't want my bourbon being confiscated.
Wow, that was great! I want to give a great big thank you to Mr. Burrito Bowl for writing such an in-depth article, and now you can go out and impress your friends and their wives and girlfriends! Or better yet, their husbands and boyfriends!
Also, since you're already packing up some bourbon anyway, might as well ship some over my way too. Anything really expensive would be great. Captain out!